How to Cut a Cherimoya? 8 Easy Steps!
Cutting a cherimoya requires a simple yet precise technique to enjoy its sweet, custardy flesh. Select a ripe cherimoya, which should yield slightly to pressure.
Wash the fruit, then slice it in half to reveal the white interior and black seeds. Remove the seeds carefully, as they are not edible, and cut the fruit into manageable pieces before consuming. Store any leftovers in the refrigerator.
To properly cut a cherimoya:
By following these steps, you can safely prepare and enjoy a cherimoya.
Discover the sweetness of cherimoya by mastering the simple art of cutting it for your next tropical treat.

Key Takeaway
Step 1: Selecting the Right Cherimoya
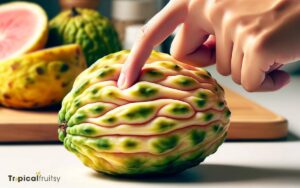
Before cutting into a cherimoya, it’s essential to choose one that’s ripe and ready to eat. A ripe cherimoya will yield slightly to gentle pressure, similar to a ripe avocado.
Its skin should be green without any brown spots, which can indicate overripeness. One shouldn’t be deterred by minor blemishes, as these don’t affect the fruit’s quality.
When lifted, the cherimoya should feel heavy for its size, a sign that it’s juicy and not dried out. If the stem pulls away easily, this is another good indication of ripeness.
For those who can’t find a ripe fruit, they can buy a firmer cherimoya and let it ripen at room temperature for a few days. Avoid refrigeration as it halts the ripening process.
Step 2: Washing and Preparing
Sanitation is crucial, so you’ll want to wash the cherimoya thoroughly under running water before cutting into it. This step removes any potential surface contaminants, including pesticides and bacteria that may linger on the skin.
Gently rub the surface with your hands or use a soft brush if necessary, especially since cherimoya skin can harbor small amounts of dirt in its crevices.
After rinsing, pat the fruit dry with a clean towel to prevent any slipping while cutting. Ensure you have a sharp knife and a stable cutting surface to make precise cuts without exerting excessive pressure, which could compromise the fruit’s integrity.
With the cherimoya clean and dry, you’re now ready to proceed to the cutting stage, where you’ll unlock the creamy, sweet flesh inside.
Step 3: Identifying Ripeness
To ensure the best flavor and texture, it’s vital to cut a cherimoya when it’s reached peak ripeness. A ripe cherimoya yields slightly under gentle pressure, much like a ripe avocado.
The skin should be greenish-brown, and the fruit may have some black spots, which shouldn’t deter you, as they’re normal and don’t indicate spoilage.
However, if the fruit feels very soft or mushy, it’s overripe. An underripe cherimoya is hard to the touch and will require a few days at room temperature to ripen.
One can also sniff the blossom end of the cherimoya; a sweet, tropical fragrance is a reliable indicator of ripeness.
It’s essential not to rush the process—patience will reward you with the creamy, custard-like texture that cherimoya is celebrated for.
Step 4: Proper Cutting Technique
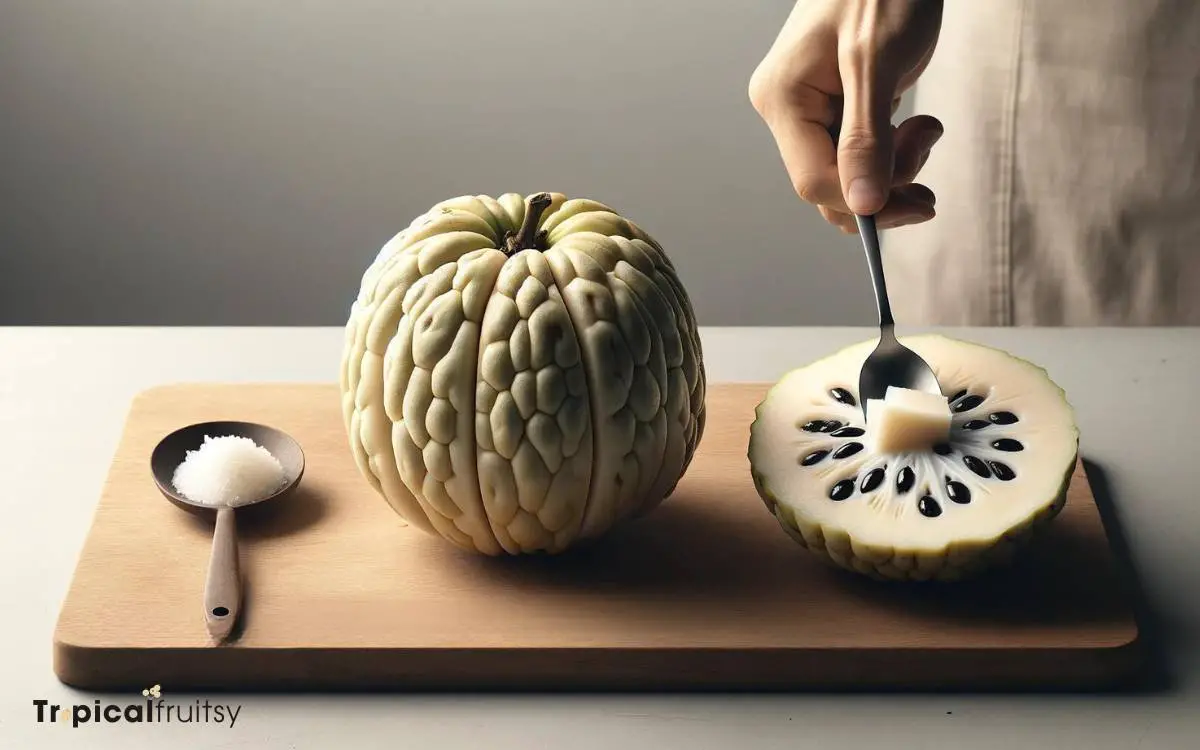
Once you’ve determined that the cherimoya is ripe, place it on a stable cutting surface and, using a sharp knife, slice it in half lengthwise.
The knife should glide through the creamy flesh with ease, avoiding any forceful cutting that could crush the fruit. Make sure to cut through the center, allowing the fruit to open neatly into two equal halves.
This exposes the inner fruit while maintaining its structural integrity, which is crucial for the subsequent steps.
While handling the halves, it’s important to support the fruit with your hand to prevent it from breaking apart. The cut should be smooth and deliberate, revealing the seed-studded heart of the cherimoya.
With the fruit now open, we’ll move on to removing the seeds, ensuring a pleasant eating experience.
Step 5: Removing the Seeds
After slicing the cherimoya open, you’ll notice the black seeds embedded within the creamy flesh; these must be removed before consumption.
The seeds are not only inedible but can be toxic if crushed. Use a spoon or your fingers to gently pry the seeds out without damaging the delicate fruit around them. It’s a meticulous process, but necessary to fully enjoy the cherimoya’s unique flavor.
| Step | Tool | Tips |
|---|---|---|
| 1 | Spoon/Fingers | Be gentle to avoid bruising |
| 2 | Bowl | Dispose of seeds immediately |
| 3 | Patience | Take your time |
| 4 | Inspection | Double-check for left seeds |
| 5 | Enjoyment | Savor the seedless fruit |
Step 6: Segmenting the Fruit
Segmenting is straightforward and allows you to enjoy the fruit with minimal fuss.
To ensure you’re doing it correctly, follow these steps:
- Position the Fruit: Lay the cherimoya on its side on a stable cutting surface.
- Slice into Wedges: Cut the fruit into uniform wedges, much like you’d a melon, to create manageable pieces.
- Peel the Skin: Gently peel away the outer skin from each segment, which can be tough and inedible.
- Inspect for Leftover Seeds: Double-check each segment for any remaining seeds and remove them.
Segmenting cherimoya enhances the overall eating experience. Now, let’s move on to some creative serving suggestions to truly savor this exotic delicacy.
Step 7: Serving Suggestions
Although cherimoya can be enjoyed on its own, incorporating it into various dishes elevates its tropical flavor.
For a refreshing option, mix cherimoya chunks with other fruits to create an exotic salad, drizzled with a touch of lime to enhance its natural sweetness. It also blends smoothly into creamy desserts like mousses and custards, offering a rich, custard-like texture.
For those preferring savory applications, cherimoya’s subtle sweetness pairs well with spicy flavors in salsas or ceviches, providing a delightful contrast.
It’s an excellent topping for yogurt or ice cream, and when pureed, makes a unique sauce for delicate white fish or chicken.
As you savor the versatility of cherimoya, remember that any leftovers need to be stored properly.
Step 8: Storing Leftovers
Once a cherimoya is cut, proper storage is crucial to maintain its freshness. They should be stored in the refrigerator where they can last for a couple of days if kept in an airtight container.
To prevent browning, one can apply citrus juice, which slows down oxidation and preserves the fruit’s vibrant color.
Refrigeration Shelf Life
After cutting a cherimoya, store the leftovers in the fridge for up to three days to maintain freshness.
Cherimoya is a delicate fruit, and once sliced open, its shelf life diminishes quickly. Proper storage is crucial to savoring its unique flavor even after it’s been cut.
To ensure the fruit remains as fresh as possible, keep in mind the following tips:
- Wrap the cut cherimoya tightly in cling film to limit air exposure.
- Place the wrapped fruit in a shallow container to avoid any bruising.
- Store the cherimoya in the crisper drawer for optimal humidity control.
- Check the fruit daily for any signs of spoilage, such as browning or an off odor.
For even better preservation, consider using an airtight container, which we’ll explore next.
Airtight Container Usage
Utilizing an airtight container can extend a cherimoya’s freshness beyond the three-day mark typically expected with basic refrigeration methods.
Once a cherimoya is cut, it’s crucial to minimize its exposure to air to prevent oxidation, which leads to spoilage.
An airtight container ensures the fruit remains in a controlled environment, substantially slowing down the degradation process.
It’s advisable to wrap the leftover cherimoya piece in cling film before placing it in the container to further reduce air exposure. This technique also helps to retain the fruit’s moisture content and flavor.
When stored correctly, the cherimoya leftovers can remain fresh and delicious for up to five days, maximizing the enjoyment of this exotic fruit.
Preventing Browning Techniques
To prevent the browning of leftover cherimoya, it’s essential to apply certain techniques immediately after cutting the fruit. The exposure to air triggers oxidation, leading to discoloration and potential flavor loss.
To maintain the fruit’s freshness and appearance, consider the following methods:
- Citrus Bath: Submerge the cherimoya pieces in lemon or lime juice to slow down the oxidation process.
- Airtight Storage: Seal the fruit tightly in plastic wrap or a container with minimal air space.
- Vacuum Sealing: Use a vacuum sealer to remove air and preserve the cherimoya’s color and taste.
- Refrigeration: Keep the sealed cherimoya in the fridge to retard the browning reaction and prolong its shelf life.
Employing these strategies allows enthusiasts to enjoy their cherimoya at its best even after storage.
Conclusion
In the dance of delicacy, one’s hands become the sculptor’s, carving through the cherimoya’s creamy canvas. With each slice, the hidden jewels—its seeds—are gently unearthed and set aside.
In segmenting, one crafts a constellation of flavors ready to burst upon the palate. Served simply, the fruit whispers tales of tropical climates.
Any remnants, swaddled in cool darkness, await a future encore. The cherimoya’s fleeting symphony of taste thus lingers, a sweet echo in the fruit bowl of memory.


