How to Grow Cherimoya from Seed? 6 Easy Steps!
Cultivating cherimoya from seed is a feasible project for enthusiasts of this unique fruit. The process involves selecting viable seeds from ripe cherimoya, germinating them after a soaking period, and ensuring the right conditions for growth.
With proper care, including watering, fertilization, and pest control, you can successfully grow cherimoya trees that will produce the fruit known for its sweet, custard-like flavor.
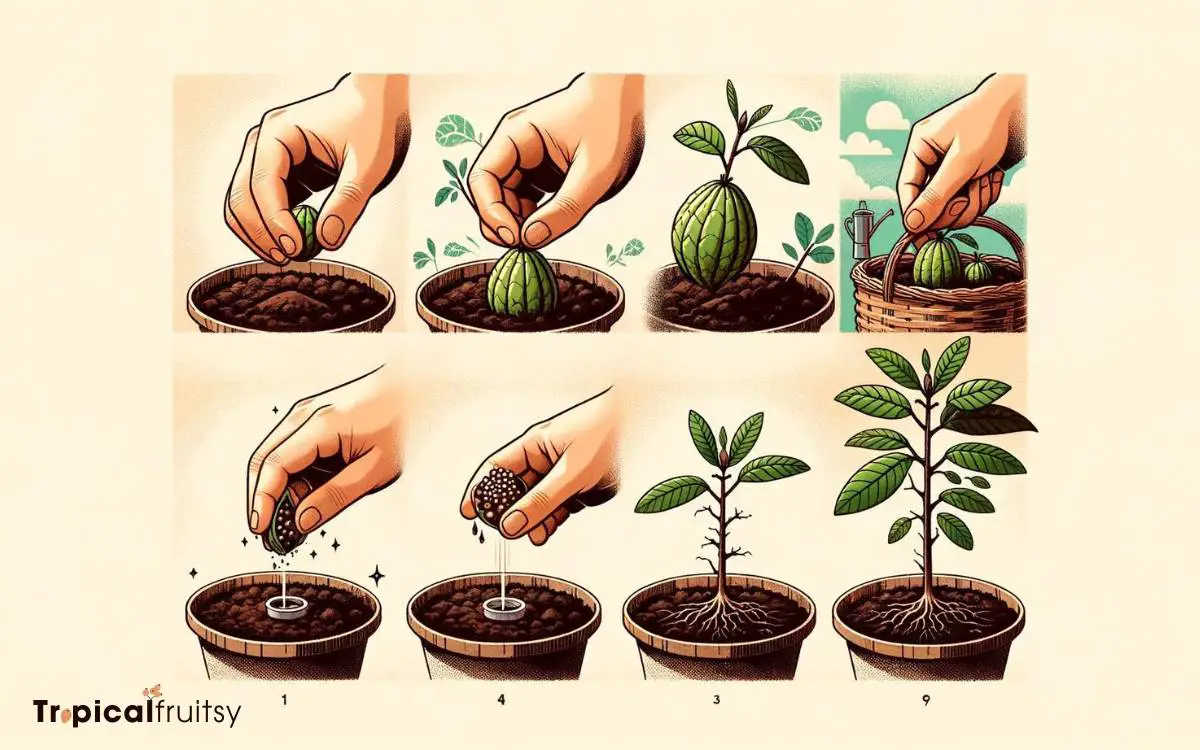
To grow cherimoya from seed, follow these steps:
Growing cherimoya from seed requires time and care, but the reward of harvesting your own custard-flavored fruit is truly gratifying.

Key Takeaway
Step 1: Selecting Quality Seeds
To ensure a successful cherimoya crop, one must start by selecting seeds from within ripe, healthy fruits. The parental cultivar’s genetics play a pivotal role in determining the quality and characteristics of the progeny.
Seeds should be extracted from fruits that aren’t only mature but also exhibit superior traits, such as optimal sugar content, minimal seed-to-pulp ratio, and resistance to pests and diseases.
It’s crucial to choose seeds from cherimoya cultivars adapted to the grower’s specific climate and soil conditions to increase the likelihood of a thriving crop.
Once collected, the seeds must be cleaned thoroughly to eliminate any pulp residue, which may harbor pathogens.
This sets the stage for the next critical phase: the seed germination process.
Step 2: Seed Germination Process
The germination process for cherimoya seeds requires specific conditions to initiate growth, with temperature and humidity playing pivotal roles.
Careful preparation of the seeds, including scarification or soaking, can enhance germination rates for this cultivar.
Typically, cherimoya seeds will germinate within three to eight weeks when provided with the ideal environment.
Optimal Germination Conditions
For successful cherimoya seed germination, it’s essential to maintain a warm, humid environment and provide ample water.
Cherimoya seeds require a consistent temperature between 20°C to 25°C (68°F to 77°F) to optimize metabolic processes involved in germination.
Soil moisture should be monitored closely, maintaining a level that’s moist but not waterlogged, to prevent seed rot. A well-draining substrate enriched with organic matter can improve root aeration and support initial growth.
Relative humidity levels around 60% to 80% promote effective water uptake without inciting fungal growth. Light isn’t a critical factor during the early stages of germination, but diffuse light can benefit post-germination growth.
Now, let’s delve into the seed preparation steps to further enhance the potential for a robust cherimoya sapling.
Seed Preparation Steps
Properly preparing cherimoya seeds is a crucial step to ensure they germinate effectively.
Firstly, the collector must select viable seeds from a healthy mature fruit of the desired cultivar, considering the genetic traits for propagation.
The seeds are then gently washed to remove any adhering fruit pulp, which could foster fungal growth and impede germination.
Following cleansing, a stratification process may be employed, wherein the seeds are kept in moist conditions at a low temperature, typically ranging from 5 to 10 degrees Celsius, for a period of three to four weeks.
This simulates the natural winter period, breaking seed dormancy and promoting germination.
Once stratified, the seeds are ready to be sown in a well-draining germination medium, positioned at an appropriate depth.
Germination Time Frame
After preparing the seeds, cherimoya enthusiasts can expect germination to occur within three to eight weeks under optimal conditions. Germination rates and vigor are contingent upon the cultivar and the environmental parameters.
For instance, the ‘Bays’ cultivar, renowned for its superior fruit quality, may demonstrate a more rapid germination compared to others.
The ‘White’ cultivar, although hardy, might germinate at a slower pace but with a higher resilience to variable soil conditions.
| Week | Emotional Highlight |
|---|---|
| 1-2 | Anticipation of sprouting |
| 3-4 | Initial joy at first growth |
| 5-6 | Eagerness for leaf formation |
| 7-8 | Relief at successful sprouts |
| >8 | Patience with slower cultivars |
Understanding the germination process empowers cultivators to optimize conditions and anticipate the needs of specific cherimoya varieties, ultimately fostering a more intimate connection with the growth journey of their cherished plants.
Step 3: Planting Your Sprouts
Once Cherimoya sprouts reach an adequate size, they require careful transplanting into well-prepared soil that meets their nutritional needs.
Specific cultivars may dictate the optimal spacing between sprouts to ensure healthy growth and access to sunlight.
Consistent watering, adjusted for the particular water needs of the Cherimoya variety, is crucial for the establishment of young plants.
Soil Preparation
To ensure your cherimoya sprouts thrive, select a well-draining soil mix rich in organic matter. Cherimoya cultivars demand soil with excellent fertility and aeration to promote robust root development.
The ideal pH range for cherimoya is slightly acidic to neutral, between 6.5 and 7.5.
| Soil Component | Purpose |
|---|---|
| Organic Compost | Enhances nutrient content and soil texture |
| Perlite or Sand | Provides aeration and improves drainage |
Incorporate these components into the native soil to create an optimal growing environment. It’s imperative to avoid soil compaction, which can hinder root expansion and water penetration.
A meticulous approach to soil preparation significantly impacts the health and productivity of cherimoya plants, setting a vital foundation for future growth.
Sprout Spacing
Always ensure that cherimoya sprouts are planted at least 25 feet apart to allow adequate room for growth and airflow.
This spacing is critical to prevent competition for nutrients and light, which can significantly affect the tree’s development and fruit production.
Cherimoya trees, depending on the cultivar, can grow to substantial sizes with wide-reaching branches. The Annona cherimola ‘White’ cultivar, for instance, demands ample space to accommodate its potential spread.
When planting, consider the mature canopy size to avoid future overcrowding that may necessitate pruning or even transplantation.
Researchers have observed that proper spacing not only facilitates optimal growth but also minimizes the risk of disease spread among plants.
In essence, strategic sprout spacing is a cornerstone in cultivating a healthy, productive cherimoya orchard.
Watering Requirements
Cherimoya sprouts require consistent, moderate watering to establish a strong root system after planting.
Cultivators should ensure that the soil remains moist but not waterlogged, as excessive moisture can lead to root rot, impeding the growth of these subtropical saplings.
A balance must be struck; the soil’s top layer should dry out slightly between waterings to encourage roots to seek moisture below, promoting deeper root development.
For optimal growth, the frequency and volume of watering must be adjusted according to the specific cultivar’s tolerance, local climate, and soil drainage characteristics.
Precise irrigation supports the gradual acclimatization of cherimoya sprouts to their new environment.
With the foundation set for a robust root system, attention now turns to the holistic cherimoya tree care.
Step 4: Cherimoya Tree Care
Proper irrigation is essential for a young cherimoya tree’s growth and fruit production. Cultivators must balance moisture levels, as both overwatering and underwatering can compromise the tree’s health.
Ideally, soil moisture should be checked regularly, employing methods such as tensiometers or soil moisture sensors to ensure optimal hydration.
Nutrient management is critical, with a focus on nitrogen, phosphorus, and potassium ratios suitable for the specific cultivar.
Periodic soil testing can guide the fertilization schedule, maintaining the necessary nutrient balance for robust growth.
Pruning is another vital aspect of care, aimed at enhancing air circulation and light penetration within the canopy.
It’s recommended to remove dead or diseased wood and thin out overcrowded branches, promoting a structure that supports fruit set and reduces pest and disease pressure.
Step 5: Pest and Disease Management
Beyond providing optimal care, growers must vigilantly protect cherimoya trees from common pests and diseases to ensure healthy development.
Scale insects, mealybugs, and mites frequently afflict these plants, siphoning sap and weakening the cultivars.
Fungal diseases such as anthracnose and botrytis may also emerge, particularly in humid conditions, necessitating fungicidal treatments and strategic pruning to enhance air circulation.
Implementing integrated pest management practices, including the use of horticultural oils and beneficial insects, can effectively mitigate pest populations without disrupting the ecosystem.
Regular inspections for symptoms like leaf discoloration, wilting, and stunted growth are crucial for early detection and control.
As the trees mature and overcome these challenges, attention then shifts to anticipating the rewarding phase of harvesting your cherimoyas.
Step 6: Harvesting Your Cherimoyas
Once your cherimoya trees have matured, you’ll find that harvesting the fruits requires a watchful eye to ensure they’re picked at the peak of ripeness.
The process isn’t simply about plucking fruit from the tree; rather, it’s a meticulous task that involves understanding the subtleties of the cherimoya’s developmental stages.
Here are three critical indicators to discern the perfect harvest time:
- Skin Color Shift: Observe when the skin transforms from vibrant green to a slightly yellowish hue, indicating a higher sugar content and optimal flavor development.
- Tactile Yield: Gently press the surface. A mature cherimoya will yield slightly under pressure, much like a ripe avocado.
- Peduncle Brownness: The stem (peduncle) will begin to brown, signalling that the fruit’s physiological maturity has been reached, which correlates with the peak eating quality.
Conclusion
In cultivating cherimoya, careful cultivar consideration creates copious crops. Select superior seeds, stimulate sprouting successfully, then tenderly transplant tiny trees.
Cherimoya caretakers must mitigate mites, manage maladies, and master moisture maintenance. With wisdom woven into watering and watchfulness against worms, fruitful futures flourish.
As autumn arrives, anticipate ample, aromatic awards. Harness horticultural heritage—harvest heartily, handling heirloom harvests with honor.
Growers gain gratifying green groves, gifting generations genuine gourmet gustatory gems.


